![]()
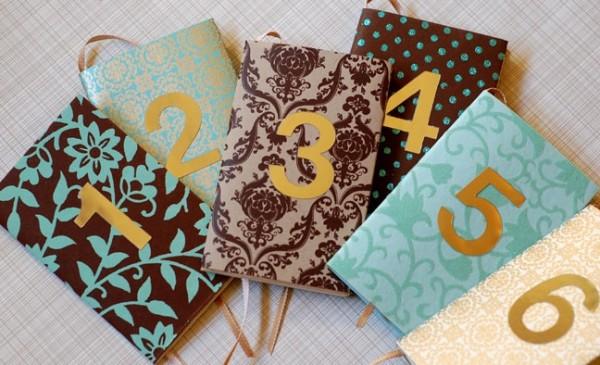
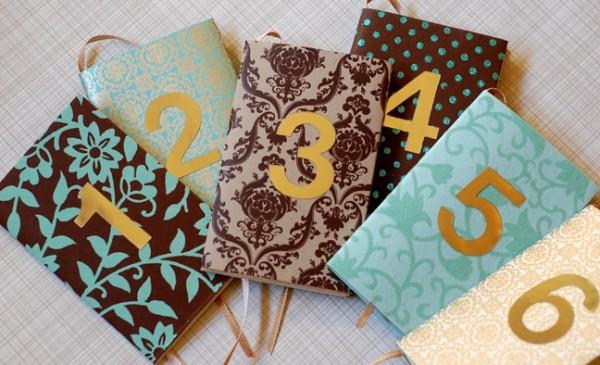
I absolutely adore this week’s project by the very talented, Laurie Cinotto. I love it when a project ends up achieving two purposes instead of one and these wonderful notebooks certainly accomplish that goal. Not only do the notebooks above function as table numbers, but they also provide guests with a place to record “love” notes for the bride and groom. I guess it is kinda a new twist on the traditional “wedding wish bowl”.
Supplies
3 ½ x 5 ½ inch Moleskine Notebooks (one for each table, they are sold in packs of 3)
Decorative paper (an assortment of coordinating colors, one half sheet per notebook)
Glue (appropriate for paper and ribbon)
Ribbon 1/8” wide ( 8.5” per notebook)
2” Gold sign makers “Stick-On” numbers ( enough for all your tables)
Double-stick tape
Tools:
Scissors
Make Your Own Rubber Stamp Kit (for type setting)
Bone folder
Moleskine Notebooks
Available at most art supply and stationary stores but the best prices are at the Moleskine online store. They offer quantity discounts. http://www.moleskines.com
Make Your Own Stamp Kit
Available at office supply stores and online at Fedex Kinkos
Paper:
Hambly Screen Prints
Available in their online shop
http://www.hamblyscreenprints.com/
Shizen Design Decorative Paper
Available at Creative Papers
http://handmade-paper.us/page/CPO/CTGY/shizen
Stick on Numbers
Manufactured by Headline Sign
Available at Office Depot and other office supply stores
Directions:
These little the notebooks function as table numbers, but also provide your guests with a place to record “love” notes for the bride and groom.
Start by making a list of possible headings for the pages of your books.
A wish for the bride and groom.
A romantic city you have visited.
The best love story you have read.
Your favorite romantic comedy.
A secret to a long and loving life.
Your favorite love song.
A cozy place for a couple to dine.
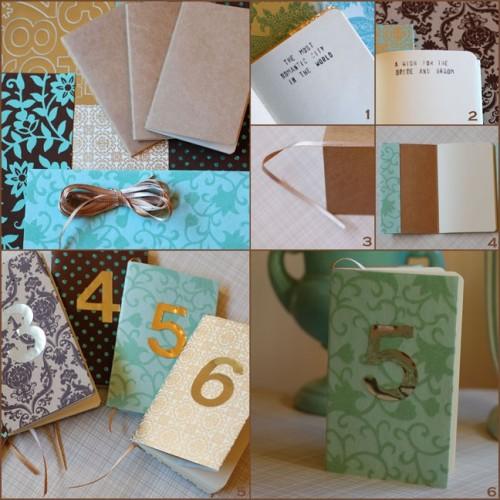
Use your stamp kit to lay out the type, then stamp the headings in the pages of each of your notebooks. Allow the ink to dry before turning the pages. (see figure one and two)
Cut a length of ribbon approximately 3 inches longer than the height of the book.
Run a one inch line of glue along the spine, starting at the top of the notebook. Place ribbon on glue line, and allow to dry. (see figure three)
Open the notebook, lay it flat and measure the height and width of the open book.
Cut a sheet of paper that is the same height, and two inches wider than the open notebook.
Turn the paper over, so the printed side is down and lay the open notebook in the center, leaving an inch of paper on each side.
Fold the left hand edge of the paper over the left edge of the cover and use your bone folding tool to make a nice crease. (see figure four) Fold the book closed and make a crease on the spine, open the book and fold the right edge of the paper over the right edge of the cover. Use your bone folder again to make a crease.
Run a length of double-sided tape under the flaps you’ve created to secure the cover.
Close the book with your ribbon bookmark inside.
Stick a gold number on the front and back of each book. (see figure 5)
Display the notebook vertically on each table so the numbers clearly show. Be sure to place coordinating pens on the table so the guests can record their notes to you.
Budget:
(price per table number/notebook)
Moleskine notebook – $3
Ribbon $.25
Decorative paper $.50
Gold stick-on numbers $2
(for a pack large enough for 10 tables)
Total cost for materials – $5.75 ![]()
Project created by Laurie Cinotto

