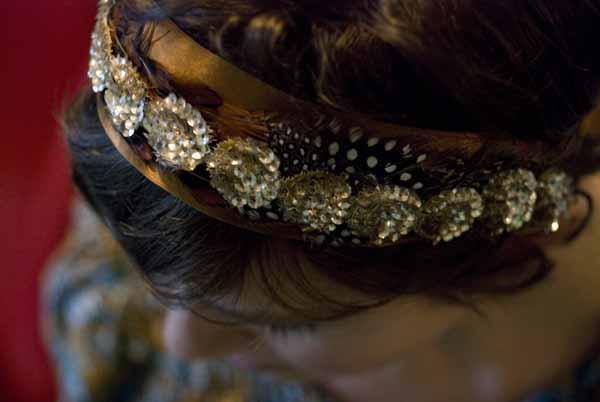
Headbands are the “it” accessory right now and what a great and inexpensive way to add flair to the look of your bridal party. Headbands are also a great way to unify a party, especially if you opt to have mismatched attendees. Click more at the bottom of the post to see the rest of the instructions for this lovely project.
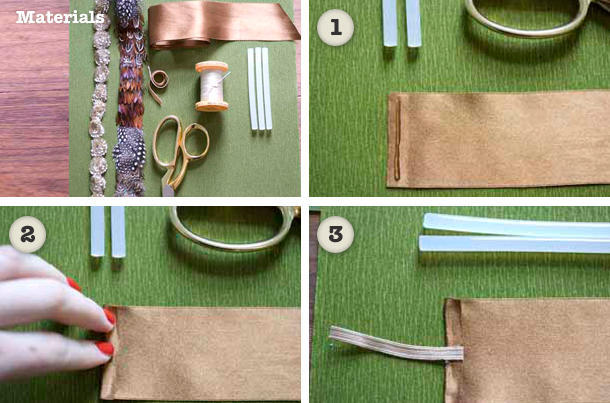
Materials & tools
-2 Different trims, both measuring from ear to ear, across forehead
-1 Ribbon, circumference of head
-1.5” Piece of ¼” elastic
-Needle & thread
-Hot glue gun and glue
-Scissors
Instructions
Steps 1 & 2-Start with ribbon, glue edge and fold it over a ¼”.
Step 3-Center elastic on ribbon and glue down a ¼” in from folded edge.
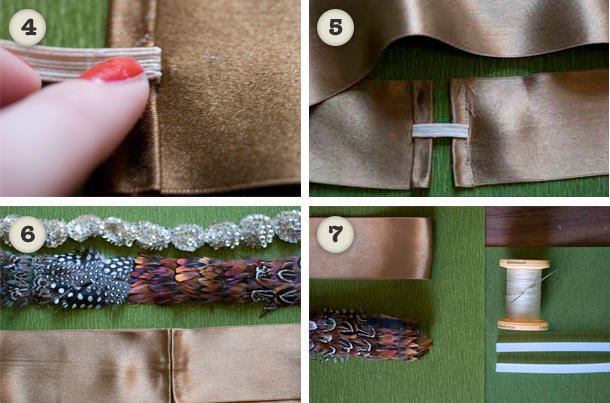
Step 4-Glue along folded edge, overtop of the elastic, and fold in again, a ¼”. Then, fold and glue elastic back over itself, as pictured.
Step 5-Repeat steps 1-4 on other end of ribbon, joining the ends together.
Step 6 & 7-Layout trims and find centers of headband and bottom trim by folding in half, then tack together at centers with hot glue.
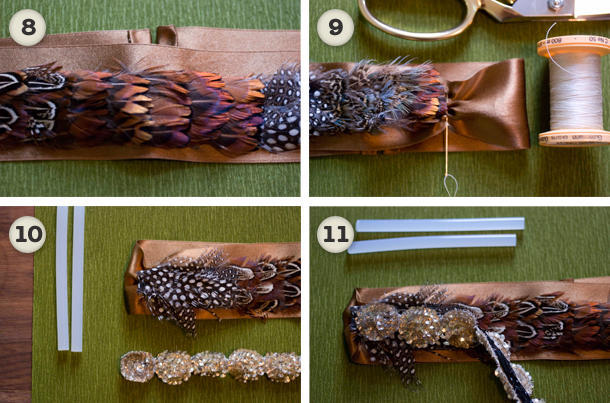
Step 8-Finish gluing bottom trim into place slowly, only gluing inch by inch, because hot glue dries quickly and you want to avoid any lumps or bumps.
Step 9-Stitch and gather headband ribbon just behind the edge of first trim, repeat on opposite side
Steps 10-11-Glue finishing trim onto first trim, slowly gluing and placing for a nice and even finish.
Project created by Haylie Bird Waring
