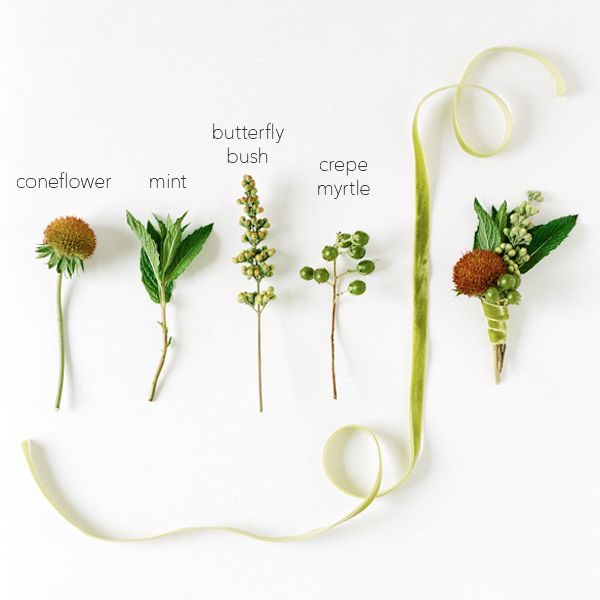
1. Pick out a few little bits of flowers/foliage you find interesting. Its nice to have more than you need so you can decide what looks best together and what shapes and sizes are working for you.
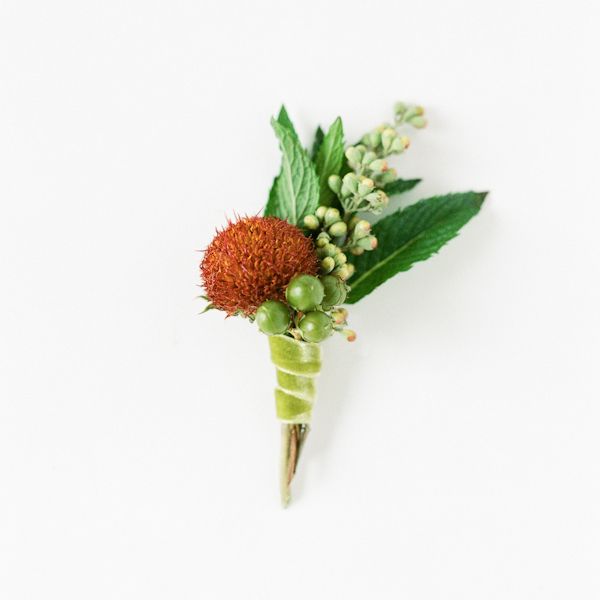
2. Usually you want to start with some kind of main flower or focal point, in this case its the center of a coneflower.
3. Next I added some leafy parts, mint, here. And I like to make the leafy part go toward the right usually because I think it looks nicer going that direction once it’s pinned on the (left) lapel.
4. Lastly I worked in some little detail filler bits. Here I ended up using the tip of some buds on a butterfly bush and some of the little buds from a crepe myrtle outside. (Don’t be afraid to add in things from outside–that’s often what makes it look more natural and gardeny.)
5. Play around with the positioning until you get them where you like them. Strip off any bits from the stems that are lower than you need so that you have clean stems to wrap.
6. Use a (pretty small) piece of tape (I like to use the narrow green floral tape that is more like duct tape but you can use whatever you feel comfortable with) to hold the stems in place.
7. Wrap stems as smoothly as possible with a complimenting ribbon (or twine or whatever!). You can tie it off in a knot or secure with a pin. Covering all the stems gives a more formal look, leaving more stems showing makes a boutonniere more casual.
8. Trim the stem at an angle, tapering down so that it doesn’t end in blunt edge.
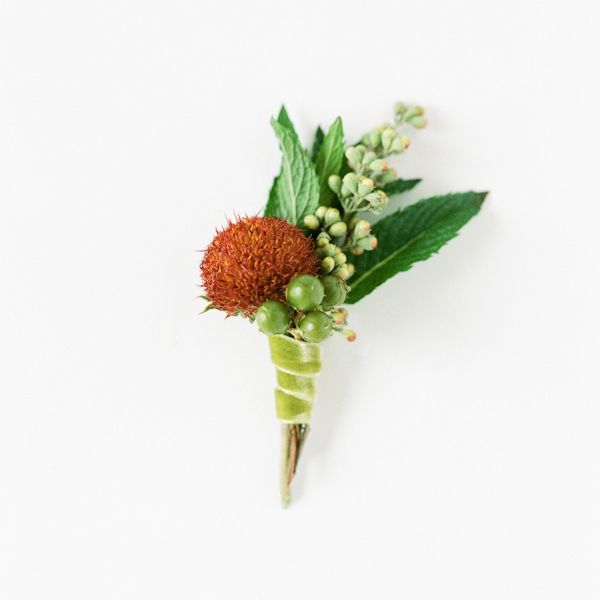
9. Smile with pride at the lovely boutonniere you just made!
Photography by Ali Harper // Styling by Joy Thigpen // Wholesale flowers by FiftyFlowers (Also! check out the FiftyFlowers blog for more flower DIY tips and ideas–its a great resource!)

