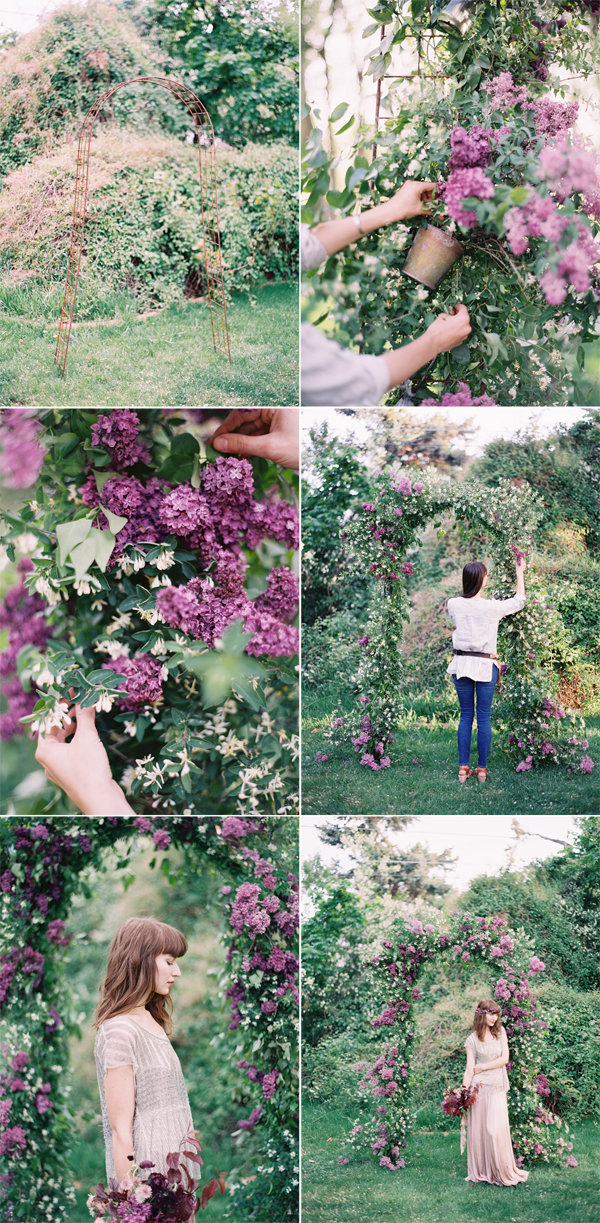
Building an arch for a wedding is a job that most people leave to professionals. It is one of the bigger jobs, and there are lots of variables and risks associated with it. You want your arch to be sturdy, no uneven ground or gusts of wind can be allowed to affect its stability. There are endless possibilities for types and shapes of arch structures, but this is one that can easily be recreated by an adventurous DIYer.

Supplies:
1. An arch base: Start with an arch base that can be mounted into the ground. This could be a small or large structure, just make sure it is balanced and can be anchored into the ground easily. These can be purchased at lots of garden or home improvement stores.
2. Some small, watertight vases or buckets that can be wired to the arch to hold the bulk of your flowers.
3. Wire
4. Water tubes
5. Flowers & greenery to fill the arch with (we used lilac here)

Instructions:
1. Start by anchoring your arch into the ground.
2. Wire your vases or small buckets to the arch. Make sure they are right side up and can hold water. I used six on this arch, use as many as you think you need to make it look full. (The number here will also depend on the length of your branches.)
3. Start filling the buckets with greenery. Make sure the stem is in the water, and then arrange the greenery so that it frames the arch and covers you base. Wire the ends of it back of the arch if they need to be held secure.
5. The great thing about this arch is that you don’t need to water tube EVERYTHING that you are putting on the arch! But, if you feel like you need to have some flowers running horizontally, or in a place where they won’t reach a bucket, water tube them, and then wire them in.
Photography Rylee Hitchner | Floral Design Sarah Winward of Honey of A Thousand Flowers | Model Elyse Wynn


